How To Upgrade Windows Server 2008 R2 To Windows Server 2012
Windows Server from 2008 R2 to 2012 R2 can significantly enhance your server’s performance and security. This comprehensive guide will walk you through the process step by step, ensuring a smooth transition.
Step 1: Prepare for the Upgrade
Before starting the upgrade, it’s crucial to ensure your system meets the requirements for Windows Server 2012 R2. Check your hardware compatibility and back up all essential data to avoid data loss during the upgrade process.
Requirements:
- 1.4 GHz 64-bit processor
- 512 MB RAM
- 32 GB of disk space
- DVD drive or USB port
Step 2: Start the In-Place Upgrade
- Insert the Windows Server 2012 R2 installation media (DVD or USB drive) into your server.
- Open File Explorer and navigate to the installation media.
- Run the setup.exe file to begin the installation process.
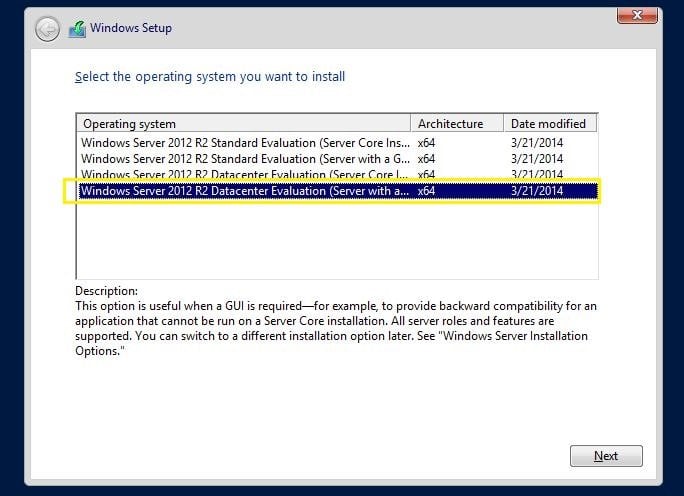
Step 3: Choose the Installation Type
You will be prompted to choose between two installation types:
- Upgrade: This option allows you to install the Windows Server operating system while keeping your personal files, settings, and applications.
- Custom: This option allows you to perform a fresh installation, which will delete all files, settings, and applications.
For an in-place upgrade, select Upgrade.
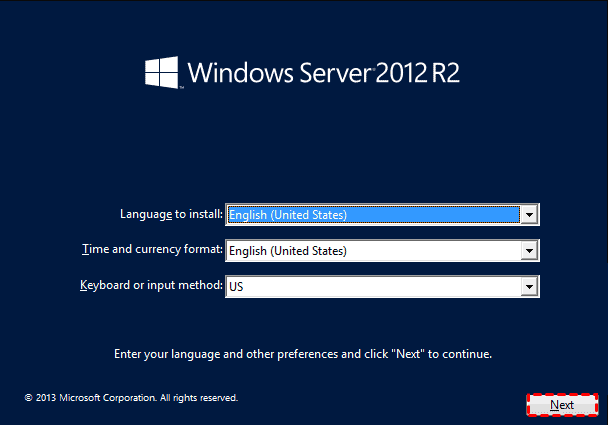
Step 4: Follow the Installation Wizard
The installation wizard will guide you through the process. Follow these steps:
- Read and accept the license terms.
- Select the upgrade option to keep your files and settings.
- The wizard will check for compatibility issues and prompt you to resolve any found.
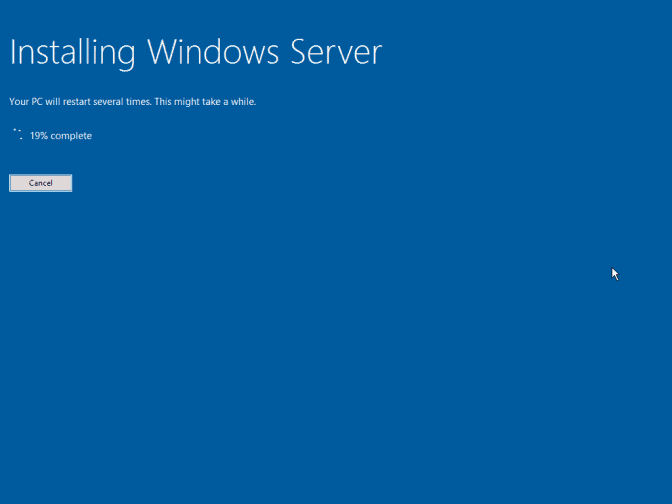
Step 5: Complete the Installation
The server will reboot multiple times during the installation. Once the installation is complete, the server will display the Windows Server 2012 R2 login screen.
Detailed Steps with Images
1. Insert Installation Media
Insert the Windows Server 2012 R2 installation media into the server’s DVD drive or connect a bootable USB drive.
2. Open File Explorer
Navigate to the installation media in File Explorer and double-click on setup.exe to start the installation process.
3. Run Setup
Follow the prompts from the setup wizard. Choose Upgrade to retain your files, settings, and applications.
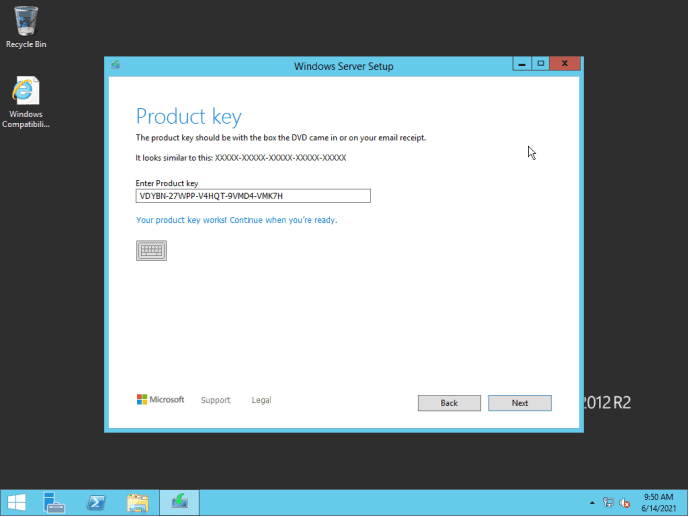
4. License Terms
Carefully read and accept the license terms to proceed with the installation.
5. Compatibility Check
The wizard will perform a compatibility check to ensure your system meets the requirements for Windows Server 2012 R2.
6. Reboot and Complete Installation
The server will restart several times during the installation. After the final reboot, you will see the Windows Server 2012 R2 login screen.
Why Upgrade?
Upgrading to Windows Server 2012 R2 offers numerous benefits, including improved security, enhanced performance, and new features that can streamline your server management.
Backup Your Data Before beginning the upgrade, ensure all critical data is backed up to prevent data loss.
Seek Expert Assistance If you encounter any issues or need assistance, our experts are available to help you through the process. Order now and download your activation license for a hassle-free experience.
-
 Windows Server 2019 RDS Device CALPrice range: 89.00 $ through 100.00 $
 -
 Exchange Server 2019 Standard399.00 $
 -
Product on sale
 SharePoint Server Standard 2019Original price was: 1,200.00 $.500.00 $Current price is: 500.00 $.
 -
Product on sale
 Windows Server 2012 standardOriginal price was: 199.00 $.79.00 $Current price is: 79.00 $.
 -
Product on sale
Ms Windows server 2012 EssentialsOriginal price was: 280.00 $.99.00 $Current price is: 99.00 $.
-
Product on sale
Windows Server 2012 R2 standardOriginal price was: 199.00 $.79.00 $Current price is: 79.00 $.


Leave a Reply