How to Install Parallels Desktop 20 and Windows 11 on Your Mac
If you’re a Mac user determined to run Windows applications smoothly alongside macOS, Parallels Desktop 20 is the ultimate solution you need. Whether you’re a developer or relying on Windows-specific software, this guide empowers you to set everything up effortlessly. Running Windows applications on a Mac is now easier than ever with Parallels Desktop 20. This powerful tool is essential for professionals who require Windows-exclusive tools or students who want to enhance their workflow. In this guide, we’ll confidently show you the steps to install Parallels Desktop 20 for mac and set up Windows 11 on your Mac.

Why Choose Parallels Desktop 20 for Mac?
Parallels Desktop 20 offers unmatched compatibility and performance for running Windows on macOS. Here are some key benefits:
- macOS Compatibility: Supports macOS Ventura, Sonoma, and later versions.
- Seamless Integration: Run Windows applications alongside macOS without rebooting.
- Enhanced Performance: Improved speed and efficiency with optimized resource allocation.
- User-Friendly Interface: Easy installation and setup for all users, regardless of technical expertise.
What You’ll Need Before Starting
- To install Parallels Desktop 20 and Windows 11, ensure you have the following:
- A Mac running macOS 10.15 or later.
- A valid Parallels Desktop 20 key.
- A Windows 11 ISO file, which you can download from Microsoft’s official website.
- Step-by-Step Guide to Installing Parallels Desktop 20 and Windows 11
Step-by-Step Guide to Installing Parallels Desktop 20 and Windows 11
Step1: Download and Install Parallels Desktop 20
- Go to the official Parallels Desktop website. Avoid downloading from the Mac App Store, as it may have limitations compared to the version available on the official site. After purchasing, you will receive a download link via email.
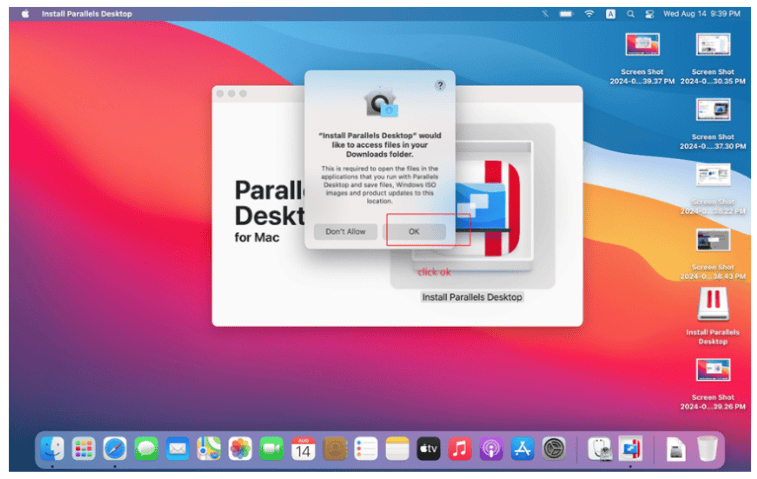
- Open the downloaded file and follow the on-screen instructions to install the software.
- Once the installation is complete, launch Parallels Desktop 20 on your Mac.
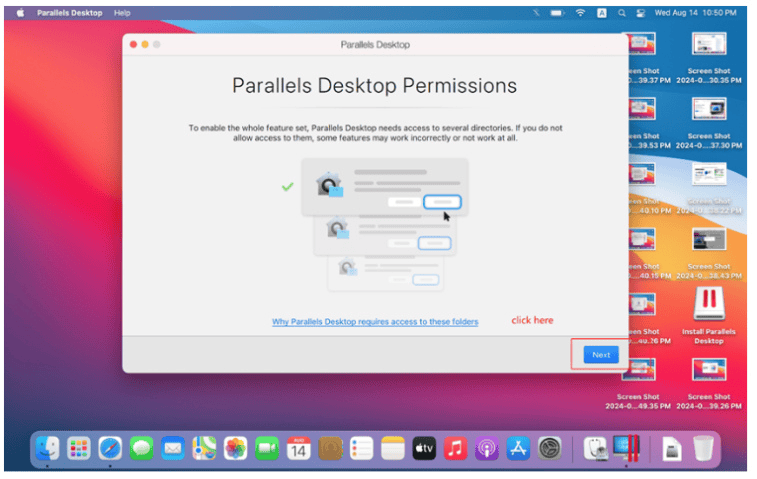
Step 2: Activate Your Parallels Desktop 20 Key
- When prompted, enter your valid Parallels Desktop 20 key to activate the software.
- Activation unlocks premium features and ensures optimal performance.
- If you encounter any issues during activation, refer to the troubleshooting section below.
Step 3: Download and Set Up Windows 11
- Go to the Microsoft website and download the Windows 11 ISO file.
- Open Parallels Desktop 20 and select “Install Windows or another OS from a DVD or image file.”
- Choose the downloaded Windows 11 ISO file and follow the guided installation steps.
- Customize the resource allocation (e.g., CPU and RAM) for the virtual machine as needed.
Step 4: Complete the Installation
- Wait for the installation process to complete. Parallels Desktop 20 will automatically configure Windows 11 for optimal performance.
- Once the setup is finished, you can start using Windows 11 on your Mac.
Conclusion
Parallels Desktop 20 is the best piece of software available to run Windows 11 on your Mac. Use this manual to effortlessly configure both the program and the operating system. Don’t forget, for a more fluid experience, while using the software’s features a genuine Parallels Desktop 20 key is used for activation. Enjoy your work!


Leave a Reply